Christmas Cake Pops


Joe had a Club Christmas party over the past weekend and volunteered me to make a dessert for about 45 people. I figured making some cake pops would be the best bet because they're simple, one bite desserts, I could make a couple different flavors and I got a new stand for pops/cupcakes that I was dying to use!


These little guys came out really cute and I adore the stand! It also doubles as a cupcake stand by adding the larger separators - and it has a little carrying hook part for your fingers at the top as well, although I transported them in a tupperware then assembled them at the party.

Here were the selections:


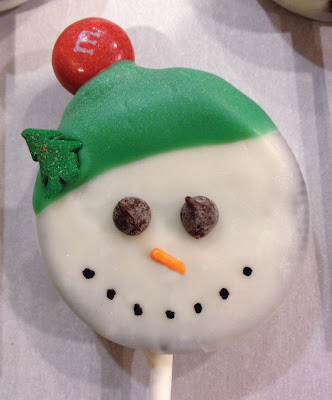
Additionally, I had seen a recipe for these Oreo Snowmen


Knowing how much Joe likes Oreos I figured I'd make them as well. The problem though with these guys is that the sticks do not fit in between the Oreo cookies. So you therefore have to unscrew each one (hoping not to break them) then carve out a little place for the stick to rest, add some melting chocolate as "glue" and out the top of the cookie back on. All without breaking one side of the cookie. I broke about half a package of cookies trying to do this (which I saved for use in another dessert).


Thankfully before I threw in the towel, Joe stepped in and made them all work, and even put the hats and faces on them after I dipped them in the white chocolate - he seriously saved the day with these and it seems that they were quite popular that night as well. 

To recap: 
Oreos - separated and sealed with melting chocolate and a stick. Let set. 
Dip entire Cookie in white chocolate melts. Let set. 
Dip corner of cookie in a color for the hat, top with M&M candy (I used Mint flavored). Let set. 

Faces: You can do whatever here I used a combination of mini chocolate chips, an orange sprinkle (yes, I plucked out the orange ones from a container of rainbow) and then I used a food coloring marker for the mouth, although I'm sure you could use some melted chocolate as well. 


Apple Cinnamon Breakfast Donut Muffins


I haven't posted in quite some time, but that doesn't mean I haven't been cooking! Here's some things to catch you up...during the hurricane life without power was getting pretty dull. Lucky for us we had a generator and were able to crank up about half the house...so I started baking. These muffins I've had pinned for quite some time, and these photos were from the second time I made them. The recipe is from Sweet Pea's Kitchen called Brown Sugar Pecan Pear Muffins

However, I swapped out pears for apples because I had them on hand, and also omitted the pecans. I also glazed these muffins from another one of Christina's recipes found here: Glazed Donut Muffins


These muffins are so easy to make, although I was really surprised at how THICK the batter was. It's REALLY thick, so be forewarned...they'll still cook up fine! I thought at first I had forgotten an ingredient, but nope. all was well.


Once cooled, Dip them in the glaze mixture and let it set...Super delicious muffins!


Cookie Butter Cookies


About a month ago my partner at work had told me that on a visit to NY he had acquired a jar of "Speculoos Pasta". I had never heard of such a thing before and after reading up on it - I was intrigued. You can read the description in the photo below but as far as I could tell it's made up of mashed up cookies and some other goodness - and if you ask my brother-in-law it "tastes like Christmas morning". The consistency is smooth like creamy peanut butter - but the taste is totally different. It also goes by the name of Speculoos, Cookie Butter or Biscoff Spread depending on the brand. 


As I've mentioned, I read a LOT of food blogs. So about a week after learning about Speculoos, I began seeing it pop up in the food blogs everywhere. Now I knew I had to try this. It seemed that Trader Joe's made it's own Cookie Butter as well and since it survived the great peanut butter recall of 2012 it was a no-brainer.  


I decided for my first recipe, I'd try this one (another from Sweet Pea's Kitchen): Biscoff Oatmeal Cookies. These cookies are amazing. You must make them. Seriously incredible. I've made this recipe twice and on both occasions someone has said "these cookies are even better the second day" I'm not sure why this is - but it's definitely good to know. They come out crunchy on the outside and soft on the inside. A perfect cookie indeed.


HummingBird Bread


Earlier this year my husband and I spent the week in Atlantic Beach, NC. We went to this restaurant called The Channel Marker (twice in fact) during our trip. If you ever go there be SURE to order the Hummingbird Cake for dessert! Apparently Hummingbird cake is a popular dish in the south, however before this trip I had never heard of such a thing. This cake is reminiscent of a carrot cake but instead calls for bananas and pineapple - but at the Channel Marker they also added coconut.  Topped off with cream cheese icing - and it was to die for!


This recipe was modified from one I found HERE I was in the mood for Carrot cake, but felt like giving this one a whirl as well. So I also added carrot and coconut. 


So here was the problem. I baked this bread/cake at night, and let it cool overnight. By the next morning I had developed a pretty quick moving cold and unfortunately couldn't even taste this cake. I'm assuming that by how quickly the hubby devoured it - that is wasn't that terrible...especially given that he doesn't like carrot cake. 

I made the glaze according to the directions in the link above, and I should have known by the word "glaze" but I didn't like how liquid this glaze stayed. I was hoping it would harden at some point but never did. Of course by then, it was too late to add more sugar and thicken it up. Nonetheless I heard it tasted pretty good. I'd like to make this cake again, but I think I'll use a different recipe next time - I'm still looking to replicate the one at the Channel Marker - does anyone know their baker? Hook a sister up!


Banana Nutella Muffins

Christina over at Sweet Pea's Kitchen is one of my favorite food blogs to read. I secretly think she might be my baking kindrid spirit...Anyway, here's a recipe I made from her blog - Banana Nutella Muffins


These little guys came out great. The only difficult part form me was mixing in the nutella nicely. The batter was pretty thick, and the nutella is also thick, so it was a tad frustrating trying to mix it all in without a major disaster. Use thick liners - those paper ones weren't so conducive to mixing ;o)


However the result was delicious!


Broccoli Cakes


I really admire the food blogs that I read...I'm not sure how they have the time to cook and post everything they make in 1) a timely fashion and 2) daily! It's really quite a challenge for me. So please appreciate the backlog of entries that's about to come your way...

These cakes came from a recipe I've been using for years now, that can be found HERE however I just swap out the zucchini for broccoli depending on what I have in the fridge.

Recipe is as follows:

INGREDIENTS:
2 cups grated zucchini
2 eggs, beaten
1/4 cup chopped onion
1/2 cup all-purpose flour
1/2 cup grated Parmesan cheese
1/2 cup shredded mozzarella cheese
salt to taste
2 tablespoons vegetable oil
DIRECTIONS:
1.In a medium bowl, combine the zucchini, eggs, onion, flour, Parmesan cheese, mozzarella cheese, and salt. Stir well enough to distribute ingredients evenly.
2.Heat a small amount of oil in a skillet over medium-high heat. Drop zucchini mixture by heaping tablespoonfuls, and cook for a few minutes on each side until golden.


Sadly, I don't have any glamour shots of these guys because frankly, I just forgot...however I often serve them with a dipping sauce made up of Mayo, Ketchup and horseradish. Just adjust the quantities to your liking - I usually use 2 tbsp mayo, 1 tbsp ketchup and 1/2-1 tsp horseradish.

Enjoy!


Turkey Spinach Gyoza

THE FIRST NON-DESSERT POST!!!


Last weekend I made this recipe for the girls when we got together sat afternoon for some apps & desserts: Southwest Egg Rolls from Cake & Allie, BUT I DIDN'T TAKE ONE PICTURE. However the adventure left me with a excess amount of egg roll wrappers that I had to either freeze or use within 7 days. So it was off to find more egg roll inspired recipes.

What I made was adapted from this recipe: Chicken Gyozas

I used what I had, so it's been modified quite a bit. Here we go:

Filling: 
1 lb ground turkey
1 package frozen chopped spinach
1 tbsp chopped garlic
1/2 tsp powdered ginger (I didn't have any fresh on hand)
6 green onions sliced thin

Next up, I had to cut the wonton wrapped in quarters so they would be the correct size. Please keep in mind I was working with squares instead of rounds and I didn't have time to get all fancy-like with the folding.

I added about 1 tbsp filling in each 1/4 of a wonton wrapper, sealed the edges with water, and set them aside. The recipe said 4 min steamed with a closed lid would cook the filling (I was doubful) but here went nothing...


Shockingly enough, after 4 min, I cut one open to check and it was fully cooked! Woohooo!!!


For the dipping sauce I used some of this: Soy Vay - Veri Veri Teriyaki cut with some of this: Liquid Aminos

Now it's full steam ahead...I must've rocked out about 48 of these things and still had 12 tiny squares of wontons left over...Next up...Dessert!!


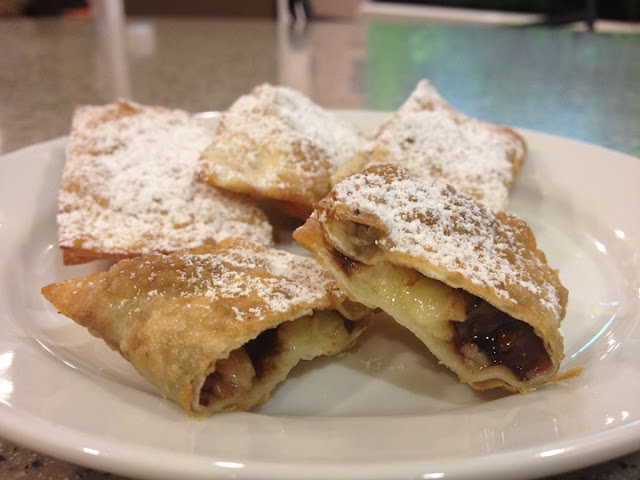
Nutella Banana Gyozas


Okay, maybe they're not technically gyoza since they were fried instead of steamed, but still...the process was the same ;o)

From my previous post you saw I had some extra wonton wrappers left over...which makes for some cooking experiments. Dinner was made so it was on to dessert. This recipe probably exists somewhere, but since it only had 3 (okay maybe 5) ingredients I just came up with it on a whim.


Fill each wonton wrapper with a slice of banana:


Top each with a bit of Nutella:


Fold, seal with water:


Fry in pan and top with powdered sugar: 


Enjoy!!


Pear Dessert

Facing an over abundance of pears I discovered hiding in the crisper drawer I was on a mission to make something pear related for dessert a few weeks back when we went to visit the folk's for dinner.

I finally settled on this recipe: Old Fashioned Pear Dessert I think it's because it has "old fashioned" in the name, and I assume that any recipe that can stand the test of time must be a winner....


Ingredients

  • 2-1/4 cups all-purpose flour
  • 3 tablespoons sugar & 2 tablespoons of sugar
  • 3/4 teaspoon salt
  • 3/4 cup cold butter, cubed
  • 3 egg yolks
  • 4-1/2 teaspoons lemon juice

First you mix up the crust ingredients above, using 3 tbsp of sugar. Then, put 1 cup of mixture aside adding an additional 2 tbsp sugar which will be used for the topping, pressing remaining mixture into a pan. This honestly was the most difficult part. They crust was somewhat dry to work with and crumbly to boot, so it made things a little difficult when trying to get it to stick to the sides.


But mission accomplished and now it was ready for the oven to bake for about 10-12 min at 375˚.

While it was baking I worked on the filling:

  • FILLING:
  • 1/2 cup sugar
  • 4 tablespoons cornstarch, divided
  • 1/2 teaspoon salt
  • 1/2 teaspoon ground cinnamon
  • 3/4 cup water
  • 2 tablespoons plus 1-1/2 teaspoons lemon juice
  • 2 tablespoons butter
  • 1 teaspoon vanilla extract
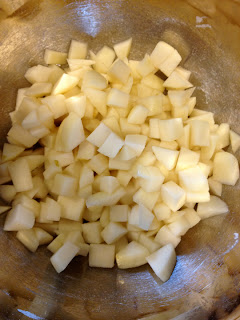
  • 5 cups chopped peeled ripe pears


Chopping pears & combining sugar, 2 tbsp cornstarch, salt and cinnamon in a saucepan with water and lemon juice stirring til smooth. Bring to a boil and cook for about 1 min until sauce is thickened, remove from heat and add butter and vanilla.


Toss pears with remaining corn starch, spoon into baked crust and pour the topping over the pears. Then sprinkle with the reserved topping.


Bake for 35-40 min or until the top i slightly browned and filling is bubbling.


Now to be honest, I was running late to dinner that night, and took this dessert to the house warm. After dinner, I was so eager to try it I forgot to get some "nice" shots of what it looked like...I only remembered after my first bite, and the desert was half gone. Needless to say it was delicious!! Next time I think I might go a little lighter on the bottom crust...I think it was a bit thick, but other then that, this old fashioned recipe lived up to it's name!


Chocolate dipped Peanut Butter Pretzel Sandwiches...


I found several versions of this recipe online. Versions can be found at LilyShop or FoodaPhelia. I modified the recipe as follows, omitting the butter and reducing the sugar.

Ingredients:
1 cup peanut butter (I used reduced fat PB - shhhhh don't tell my husband)
1/2 cup granulated or Brown sugar
1/2 cup powdered (confectioners) sugar

Semi-Sweet chocolate chips for melting
Waffle pretzels (square or round, but I suppose you could just use mini pretzels as well)

Next up, make the filling by combining the sugars and peanut butter until it makes a nice solid ball. If it's too sticky add more confectioners sugar, if it's not sticky enough add more peanut butter.

Then, you'll be making small 1/2 - 1" round balls for the middle of the sandwiches. and pressing them together as follows:

After the PB sandwiches are made, you want to stick these guys in the fridge for a bit, while you melt the chocolate in a double boiler or using your preferred method. (If you don't refrigerate them in between dipping them in chocolate, they will be soft and you will end up pinching the end you are holding to dip as you can see from some of the bites below - they'll taste just as good, just look a little catawampus)


Refrigerate or leave out on counter to cool. Again we prefer these refrigerated as well. Enjoy!

Rolo Pretzel Turtles


I've seen these online for years now and have always wanted to make them. Last Christmas my husband's aunt made them and they were devoured in about 15 minutes flat. I made these again for a friend's BBQ a few weeks ago, and don't you know the same thing happened..gone in no time flat!
Shamelessly easy recipe here:
Pretzels (waffle style round or square)
Rolos
Pecans / Almonds / Peanuts / Peanut M&Ms (your choice)

Preheat oven to 200˚
Lay pretzels on parchment lined cookie sheet.


Unwrap rolos and place on top of pretzels. Place in oven for 5 min.


Remove from oven and smoosh nut or candy on top of each rolo..


Let cool on counter for 30 min, or from faster cooling, place in fridge for 10 min. In our house we prefer these right out of the refrigerator - it makes for a chewier caramel center. Enjoy.